<< First [Prev] [Next] Last >> 1.. 2
Given this arrangement, there are two ways to make the engine use less power on the accessories and more on the wheels. One is to make the pulley lighter so that it has less rotational inertia and another is to make it smaller in diameter. Below I'm showing how I installed such a ligher and smaller pulley on my car. I'm also showing how I modified the timing chain cover to make the pulley fit.
Pulleys:
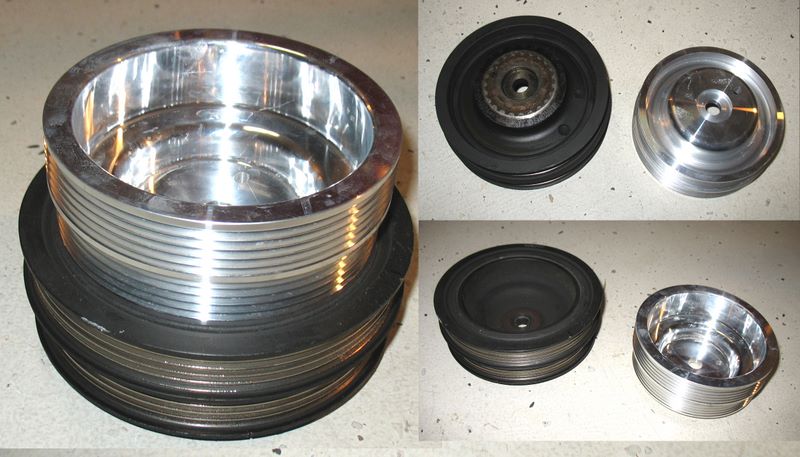
Here are pulley dimensions relevant to the mod:
| Measurement | OEM | UDP | % of OEM | Notes |
|---|---|---|---|---|
| 1st track diameter, mm | 143 | 121 | 85 | |
| 2nd track diameter, mm | 138 | 117 | 85 | |
| Weight, g | 2,150 | 506 | 23.5 | |
| Inner diameter, mm | 121 | 102 | ||
| 1st ring diameter, mm | 110 | UDP won't fit around it, ring needs to be cut | ||
| 2nd ring diameter, mm | 100 | UDP will fit around it ok |
You must also understand that because the UDP underdrives the alternator it will provide less current to electrical components. Under extreme electrical loads this may have unexpected effects on your electricals.
- 4G15 pulley - $75 shipped from eBay Australia
- Shorter alternator and A/C belts - $25
- Alternator & Water Pump - 335K5 (33.5" 5 rib belt, also fits 1999 Nissan Quest alternator)
- Power steering and A/C - 410K5 (40" 5 rib belt)
- Cutting tools (hacksaw)
- Impact wrench
- New upper / lower timing chain gasket (optional)
- Idle RPM
- RPM at highway speeds
- RPM vs gear, e.g. rpm at 60mph in 3rd gear
- Idle voltage from alternator
- Headlights and instrument cluster brightness at idle and wether it changes when pressing the gas
- Any measurement of power and gas mileage
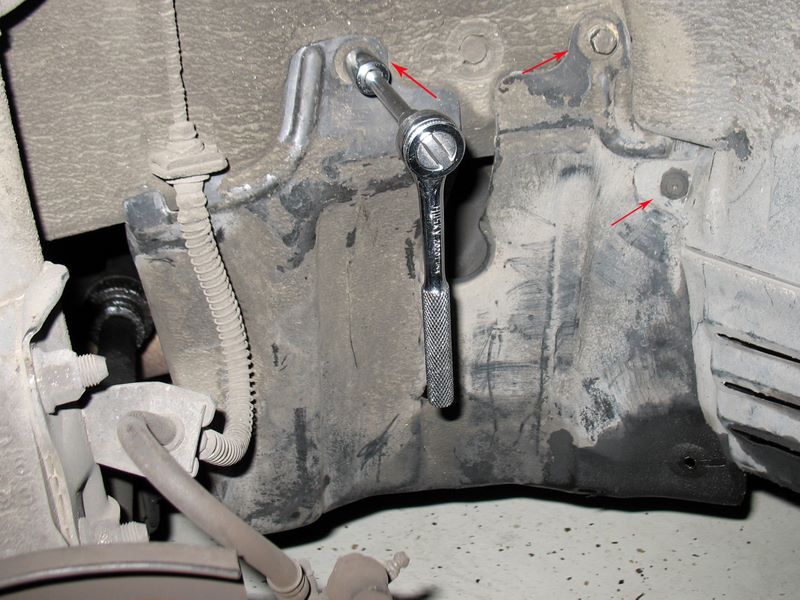
Park the car, halfway loosen passenger
wheel bolts, jack the car, set the handbrake, remove the wheel (in this order). Remove the pulley access trim. Remove the
accessory belts by following
Pulley location:
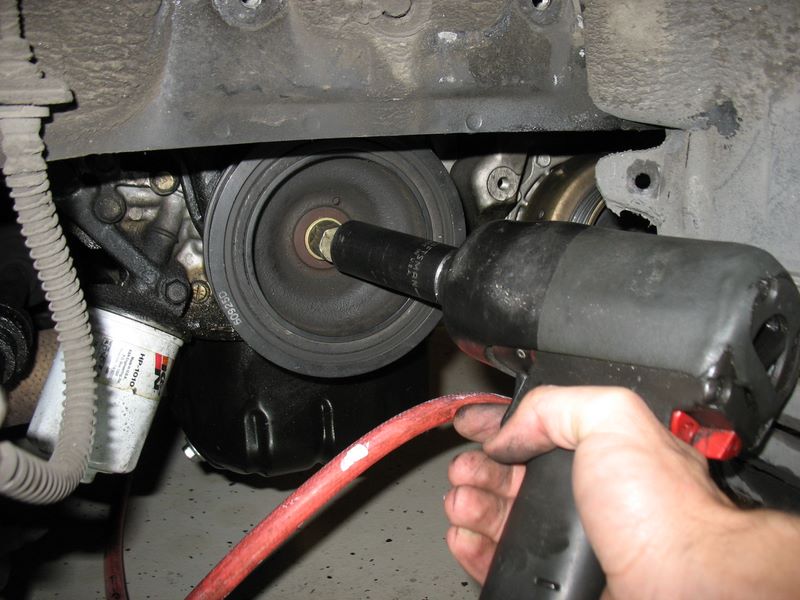
Place a carboard sheet under the pulley. The crank pulley is under a lot of torque. The car's factory service manual demonstrates a method of using a drive belt to break it loose. I heard of people propping a breaker bar against the floor and the bolt and cranking the engine to unscrew the bolt. Use these methods at your own risk. The picture below is here for a purpose... use the right tool for the job, either an air tool or an electric impact wrench. If you break or strip the bolt you'll be in a world of pain.
Remove pulley:
Crankshaft sprocket and timing cover rings:
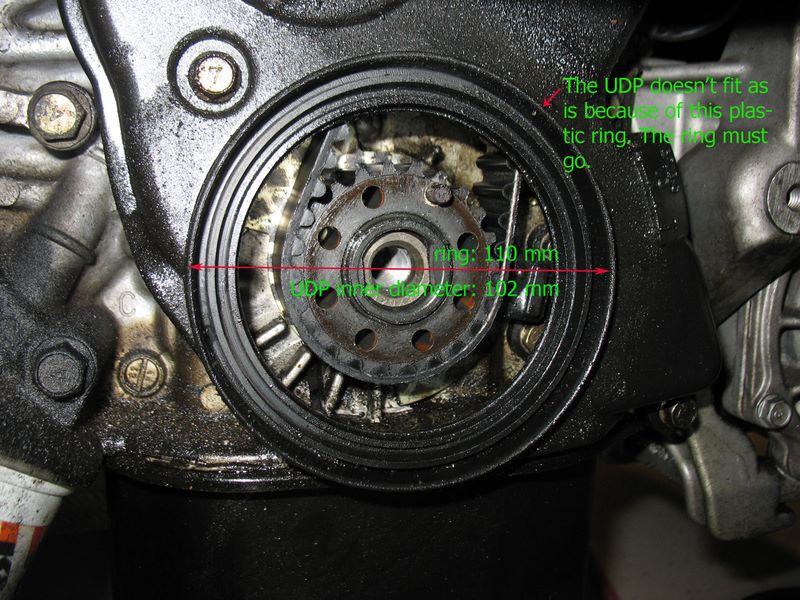
I removed this pulley to make working on the timing cover easier. You can loosen / remove the water pump pulley using one of these methods:
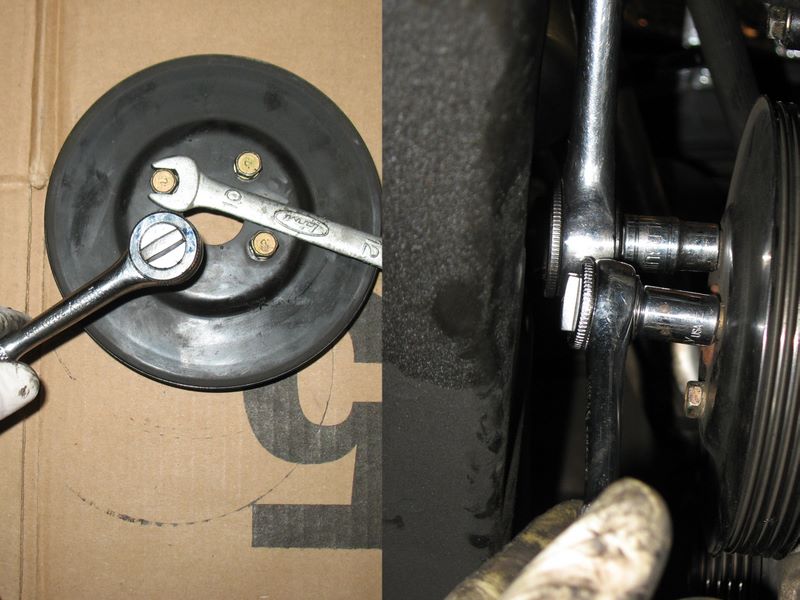
Remove Timing Cover
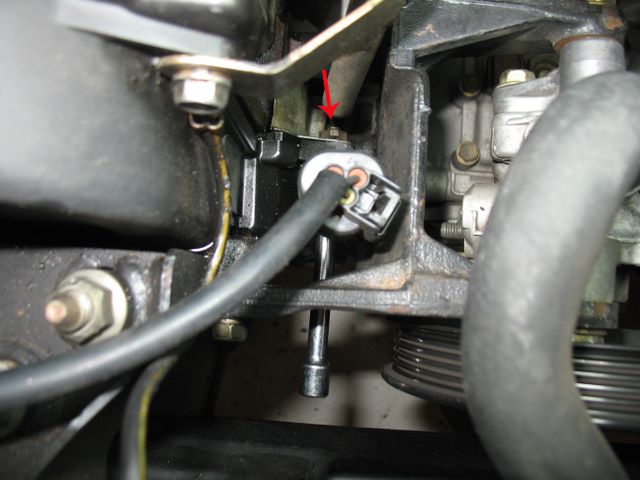
I decided to remove the timing belt cover to make it easier to cut out the access hole ring. If you do the same you may find out that the timing cover gasket has turned from rubber to brittle plastic! Get a spare gasket just in case. With the water pump pulley off, removing the timing belt cover is straightforward. The cover is held in place by 5 10mm bolts. Be careful not to lose the nut that goes with this bolt near the dipstick:
The lower timing belt cover is tucked under the upper cover, so I had to loosen it up a bit. The base of the ring is recessed in some areas so I put the timing cover on a large flashlight so I could bend down the cover and not cut unwanted material. Don't make my mistake, be sure to cover the timing marks before cutting.
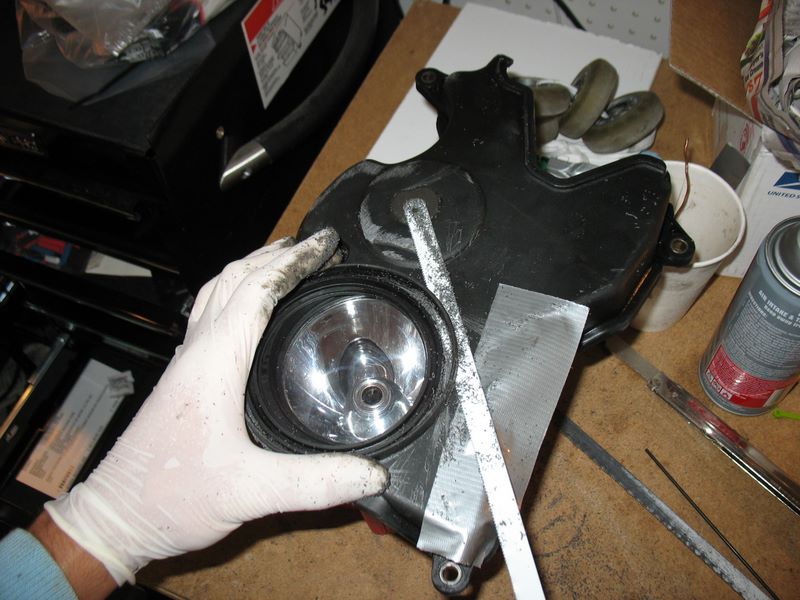
Despite my best efforts I ended up abrasing parts of the timing cover. A cleaner job would have been to break the hacksaw blade in half (to about 6-7") to ensure the cutting is limited to the ring area.
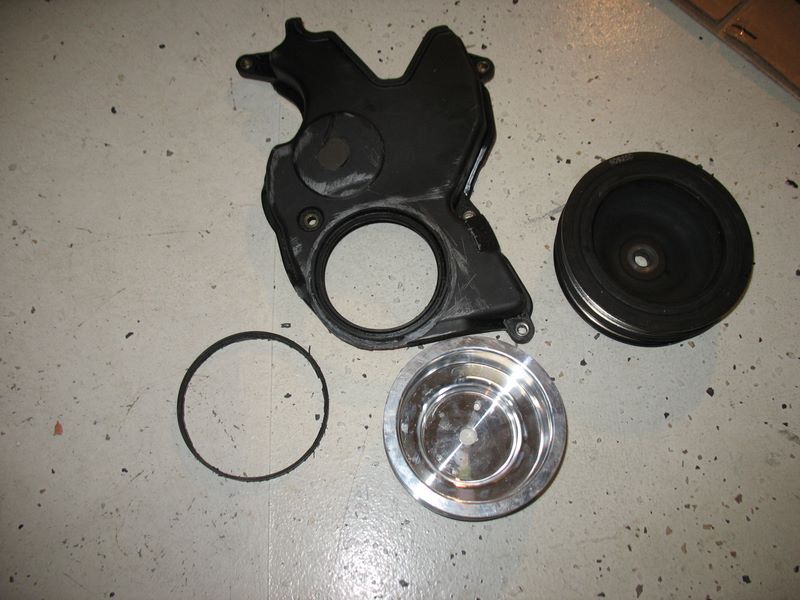
Modified cover, ready to install:
<< First [Prev] [Next] Last >> 1.. 2
To Step 2 - Install the New UDP >>